Using Google Tag Manager to Track Conversions and Boost Marketing ROI
By Brendan Byrne Thursday, March 6, 2025

Effectively tracking and optimising conversions is crucial for achieving success. One powerful tool that has transformed how marketers approach tracking is Google Tag Manager (GTM). This article will explore the benefits of GTM, guide you through setting up basic tags for tracking conversions and events, discuss common use cases, examine its integration with Google Analytics and Google Ads, and finally, assess how these efforts can enhance your marketing campaigns and ROI.
Introduction to Google Tag Manager and Its Benefits
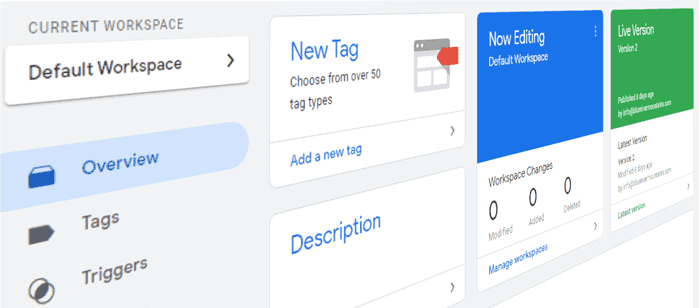
Google Tag Manager is a free, user-friendly tool that simplifies the management and deployment of marketing tags (snippets of code or tracking pixels) on your website. GTM enables marketers to streamline their tracking processes, reduce dependency on developers, and gain greater control over their tracking setup.
Key Benefits of Google Tag Manager
- Ease of Use: GTM’s intuitive interface allows marketers to create, edit, and publish tags with ease, facilitating faster implementation of tracking strategies.
- Version Control: GTM automatically tracks all changes made to tags, allowing you to revert to previous versions if necessary, ensuring stability and reliability in your tracking setup.
- Speed: By managing multiple tags in a single platform, GTM reduces page load times. Tags are fired asynchronously, which means they won't hinder your website’s performance.
- Debugging Tools: GTM includes built-in debugging features that let you test tags before publishing, ensuring everything functions as intended.
- Seamless Integration: GTM integrates smoothly with Google Analytics, Google Ads, and various third-party tools, enhancing your data collection and analysis capabilities.
How to Set Up Basic Tags for Tracking Conversions and Events
Setting up tags in Google Tag Manager is straightforward. Here’s a step-by-step guide to creating basic tags for tracking conversions and events:
Step 1: Create a GTM Account
- Sign Up: Visit the Google Tag Manager website and create a free account.
- Set Up a Container: Create a container for your website where all your tags will reside.
Step 2: Install the GTM Snippet on Your Website
- Copy the GTM Code: After creating your container, GTM will provide a code snippet.
- Paste the Snippet: Add the code snippet to the header and body of your website to enable GTM tracking.
Step 3: Create Tags for Tracking Conversions
- Access Your Container: In the GTM dashboard, select your container.
- Click on Tags: In the 'Tags' section, click 'New' to create a new tag.
- Choose Tag Type: Select 'Google Analytics: Universal Analytics' or 'Google Ads Conversion Tracking' based on your tracking needs.
- Configure Tag Settings: Enter the relevant tracking ID and define the tag's triggering conditions (e.g., when a user completes a form or makes a purchase).
- Publish Changes: After setting up the tag, publish your changes to make it live.
Step 4: Set Up Event Tracking
Event tracking allows you to monitor specific interactions on your website, such as button clicks or video views. Here’s how to set it up:
1. Create a New Tag: Follow the same steps as above, but choose ‘Google Analytics: Universal Analytics’ for the tag type.
2. Select Track Type: In the configuration, choose ‘Event’ as the track type.
3. Define Event Parameters: Specify event category, action, label, and value. For example, if tracking a button click, you might set:
- Category: Button
- Action: Click
- Label: Download
4. Set Triggers: Select a trigger for the tag, such as ‘All Clicks’ or a specific button click trigger.
5. Publish Changes: Once configured, publish the tag to activate it.
Common Use Cases for Google Tag Manager
Google Tag Manager can be applied to various tracking scenarios. Here are some common use cases:
1. Tracking Form Submissions
Monitoring form submissions is essential for measuring leads and conversions. By creating a tag that triggers on form submissions, you can collect data on how many users complete forms on your site, helping you identify high-performing forms and areas for improvement.
2. Button Click Tracking
Understanding user interactions with specific buttons can provide insights into user behaviour. By tracking button clicks, you can analyse which calls to action (CTAs) drive the most engagement and conversions, enabling you to optimise their placement and design.
3. Video Engagement Tracking
If your website features video content, tracking engagement metrics such as play, pause, and completion rates can help gauge content effectiveness. You can create tags that trigger based on specific video actions, providing valuable data on user engagement.
Integration with Google Analytics and Google Ads
Integrating Google Tag Manager with Google Analytics and Google Ads is essential for effective data analysis and campaign optimisation.
Integrating with Google Analytics
- Create a Google Analytics Tag: In GTM, create a new tag for Google Analytics.
- Configure Tag Settings: Enter your Google Analytics tracking ID.
- Set Up Triggers: Define when the tag should fire (e.g., on all page views).
- Test Your Setup: Use GTM’s preview mode to ensure data is being sent to Google Analytics correctly.
Integrating with Google Ads
- Create a Google Ads Tag: In GTM, create a new tag for Google Ads conversion tracking.
- Enter Conversion ID: Input your Google Ads conversion ID and label.
- Define Triggers: Set triggers for when conversions occur (e.g., after a purchase).
- Publish Changes: Once everything is set, publish your tag.
Measuring the Impact on Marketing Campaigns and ROI
Once your tags are set up and integrated, it’s time to analyse the collected data to measure the impact on your marketing campaigns and ROI.
Key Metrics to Monitor
- Conversion Rate: Track the percentage of visitors who complete a desired action (e.g., form submissions, purchases).
- Cost per Conversion: Determine how much you spend on advertising for each conversion, helping you assess campaign profitability.
- User Engagement: Monitor metrics like time on page, bounce rate, and page views to understand user behaviour and content effectiveness.
Using Data for Optimisation
Regularly review your data to identify trends and insights. For instance, if a particular landing page has a high bounce rate, consider optimising the content or design to enhance user engagement. Similarly, if button click rates are low, you may need to re-evaluate the placement or messaging of your CTAs.
ROI Assessment
Calculating ROI involves comparing the revenue generated from your marketing campaigns against the costs incurred. By leveraging GTM data, you can make informed decisions on where to allocate resources for maximum impact. If certain campaigns yield a high ROI, consider increasing investment in those areas.
Google Tag Manager is an invaluable tool for digital marketers, PPC specialists, and data analysts seeking to enhance their tracking capabilities and boost marketing ROI. By setting up basic tags for conversions and events, integrating with Google Analytics and Google Ads, and measuring the impact of your campaigns, you can gain actionable insights that lead to improved performance and higher returns. Embrace GTM as a central component of your digital marketing strategy, and watch your marketing efforts flourish.